Don’t Forget the Fundamentals: A Photographer’s Field Checklist

Image by Hilltop Photography & OpenAI (Not representative of Shanks Mill)
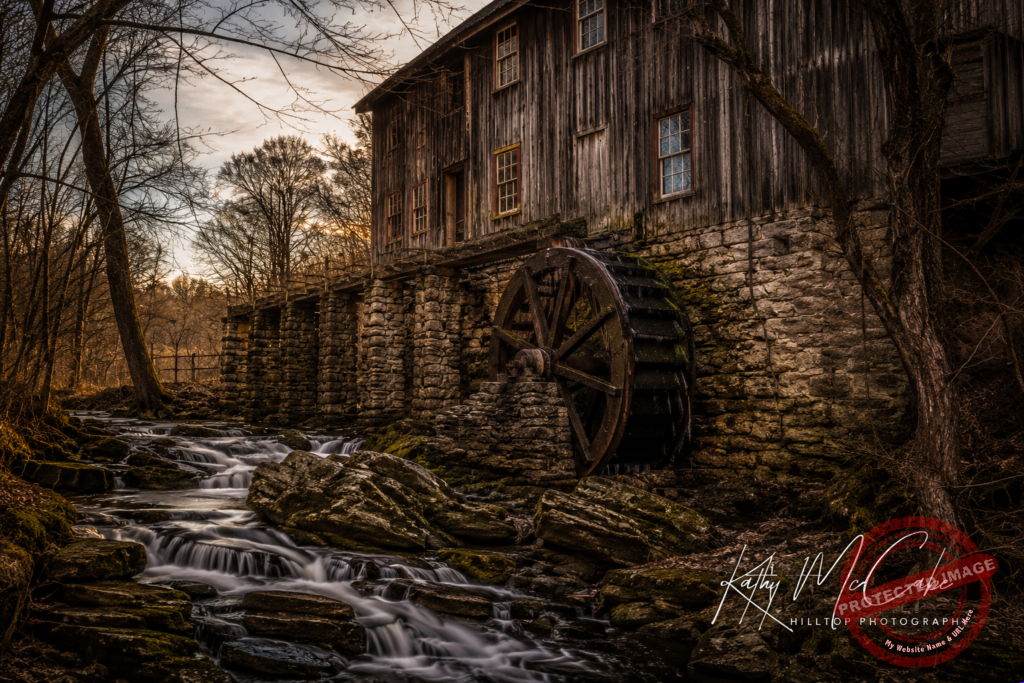
Last Friday, while photographing Shanks Mill and Farm in Fairfield, PA, I found myself doing something that many photographers have done at least once. I became so excited about the location that I immediately started chasing interesting details, textures, and creative compositions.

There is nothing wrong with that. In fact, that excitement is part of what makes photography enjoyable. The problem is that excitement can sometimes distract us from capturing the fundamental images that tell the complete story of a location.

By the time I realized it, I had already spent considerable time exploring artistic angles before documenting some of the essential views, and I also missed a few shots that would have helped tell the full story of the mill.

It was a good reminder that every successful photo shoot benefits from a simple plan.

The Four Types of Images Every Photographer Should Capture

Over the years, I’ve found that most locations can be photographed using four basic categories of images.

1. Establish the Scene

Before zooming in on details, take a step back.

Capture wide views that show the location in context. Photograph the scene from multiple directions and include the surrounding environment whenever possible. These images become invaluable when writing blog posts, documenting historic locations, or telling the complete story of a place.

2. Document the Subject

Whether you’re photographing a historic mill, a barn, a bridge, or a city street, make sure you thoroughly document the subject itself.

Photograph the structure from multiple angles and perspectives before moving on to more creative compositions. You may never have another opportunity to capture that location under the same conditions.

3. Capture the Details

Once the overall scene is documented, start looking for the smaller elements that reveal character.

Weathered wood, rusted hardware, architectural details, signs, textures, stonework, and evidence of age often become some of the most interesting photographs from a shoot.

4. Create the Art

This is where the fun begins.

After you’ve captured the documentary images, give yourself permission to experiment. Look for unique perspectives, reflections, leading lines, dramatic light, and abstract compositions. These are often the photographs that end up framed on walls, entered into exhibitions, or added to your portfolio.

My New Rule

I’ve decided to adopt a simple rule for future photo shoots:

Document first. Create second.

The artistic images may be the photographs that attract attention, but the documentary images preserve the memory of the place and ensure that nothing important is forgotten.

Free Download: Photography Field Worksheet

To help myself stay organized during future photo adventures, I created a printable Photography Field Worksheet that includes:

• Essential shot checklist

• Location and equipment notes

• Must-have shot planning

• Creative idea tracking

• Return visit notes

• Light direction and timing observations

If you’d like a copy for your own camera bag, you can download it below and take it with you on your next photo shoot.

[DOWNLOAD THE PHOTOGRAPHY FIELD WORKSHEET]

Photographing Fireflies

How to Capture Summer Magic — Even When the Skies Refuse to Cooperate

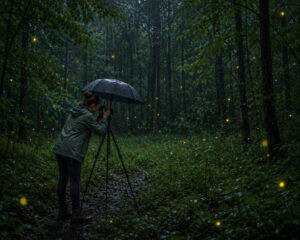
Image by Kathy McCabe & OpenAI (Because I haven’t managed to get one photo that’s worth keeping yet!)
There’s something almost surreal about fireflies drifting through a dark forest clearing. Tiny floating lanterns. Fleeting sparks of summer. And somehow, when there’s a soft rain falling, the entire world feels even more cinematic.

Unfortunately for photographers, firefly season often arrives alongside humidity, fog, mist… and endless rain. (At least here in Pennsylvania lately.)

The good news? You can absolutely photograph fireflies in both dry and rainy conditions — and rain can actually add atmosphere, reflections, depth, and mood to your images if you work with it instead of against it.

Here are some of my favorite tips for photographing fireflies — with and without the rain.

Scout Your Location Before Dark

Fireflies usually gather in:

  • Woodland edges
  • Broadleaf forests
  • Meadows
  • Wet areas near streams or ponds
  • Tall grass clearings

If possible, visit your location before sunset to:

  • Check footing and trails
  • Set up safely
  • Identify compositions
  • Avoid fumbling in the darkness

Rainy nights make this even more important because mud, roots, and slick leaves become hazards very quickly.

Use a Tripod (Always)

Firefly photography almost always requires long exposures.

Even if you have excellent image stabilization, a tripod is essential for:

  • Sharp trees and landscape detail
  • Layered firefly trails
  • Multiple stacked exposures
  • Lower ISO noise

A sturdy tripod matters even more in wet weather where soft ground can shift underneath lightweight setups.

Rain Can Actually Improve the Mood

Most photographers pack up when the rain starts.

But light rain can create:

  • Reflective foliage
  • Atmospheric haze
  • Depth from falling droplets
  • Softer contrast
  • More cinematic light

A gentle straight-down rain in a forest can become part of the image itself — especially when illuminated by ambient sky glow or distant artificial light.

The key is light rain.

Heavy downpours usually obscure fireflies and create excessive blur and lens spotting.

Protect Your Camera Gear

You do not need expensive specialty rain gear.

Simple solutions work beautifully:

  • Small umbrella clamped to tripod
  • Compact tarp over camera
  • Rain sleeve
  • Microfiber cloths in your pocket
  • Lens hood to reduce raindrops on glass

One of the simplest setups is a small umbrella angled over the tripod and camera while you stand beside it adjusting settings.

It may not look glamorous — but it works.

Camera Settings for Fireflies

A good starting point:

  • Mode: Manual
  • Focus: Manual focus
  • ISO: 800–3200
  • Aperture: f/2.8 – f/5.6
  • Shutter: 10–30 seconds

Experiment depending on:

  • Firefly activity
  • Ambient light
  • Rain intensity
  • Whether you want trails or floating points

For glowing “dots”

Use shorter exposures.

For magical drifting streaks

Use longer exposures or stack multiple frames.

Focus Before It Gets Fully Dark

Autofocus struggles badly in low-light woodland environments.

Before darkness fully falls:

  • Focus on a tree trunk
  • Focus on your intended foreground
  • Switch lens to manual focus
  • Leave it there

This prevents the camera from endlessly hunting once the fireflies appear.

Fireflies Often Peak After Humid Rain

Warm humid evenings after rain can produce incredible activity.

Some of the best conditions include:

  • Warm temperatures
  • High humidity
  • Calm winds
  • Misty air
  • Wet vegetation

Ironically, the nights photographers often avoid can become the most magical.

Include the Environment

A common mistake is photographing only the fireflies.

Instead, include:

  • Tree silhouettes
  • Paths
  • Ferns
  • Wet leaves
  • Reflections
  • Fog
  • A human figure for scale

Fireflies become far more powerful when they exist inside a scene rather than floating in empty darkness.

Watch for Lens Fogging

Humidity is often a bigger issue than rain itself.

To reduce fogging:

  • Keep gear acclimated outdoors
  • Avoid opening bags constantly
  • Use lens cloths frequently
  • Store silica packs in camera bag

Moving repeatedly between air conditioning and humid outdoors can instantly fog lenses.

Respect the Fireflies

Avoid:

  • Flash photography directly into swarms
  • Trampling habitat
  • Excessive bright lights
  • Catching large numbers in jars

Firefly populations are declining in many regions due to habitat loss and artificial light pollution.

Photograph gently and leave the environment as you found it.

Final Thoughts

Some of my favorite images happen when conditions are imperfect.

A little rain. Fog drifting through trees. Muddy boots. Damp sleeves. Fireflies glowing against wet leaves.

Those nights feel less like photography and more like stepping briefly into another world.

And honestly? Sometimes the rain is exactly what the image needed.
Happy Hunting… Kathy

Out of the Comfort Zone

I did it…

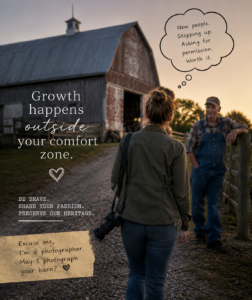
Image by Kathy McCabe & OpenAI (who captured me perfectly!)
I’ve been trying to drum up the courage to post something about wanting to photograph barns, on social media… Completely out of my comfort zone!

Today I did it!

“Seeking Barns with Stories to Tell

I’m creating a photographic series honoring the barns, stables, and outbuildings of Adams County—both working structures and weathered relics full of character and history.

If you have a barn or stable you’d be willing to let me photograph (inside, outside, and possibly aerials with permission), I’d love the opportunity to document it respectfully and preserve a small piece of our region’s heritage.

To view my work: www.hilltop.photos

Feel free to message me directly or tag someone who may be interested.”

I put it up on NextDoor because it seems to be much more local – so we’ll see… But if you know me you also know how much I am the “I’m only comfortable behind the lens, not in front of it kind of person” and I am always wanting to photograph something but hesitant to just walk up and ask.

This is a big one for me.  I’ll let you know how it goes.

Photography Ethics

I recently read an article on Peta Pixel about a fake Siberian tiger photo. It’s a good read, I recommend it. You can view it here.

It got me thinking about ethics in photography, and why we should all practice them. And the main detractors of what kind of people cross the line.

For me, in wildlife and landscape photography, when you have altered the look of the photo – including adding in mountains, and backgrounds, you’ve changed it from a photo into an artwork. And you should mention that when you publish/publicize it. If you’ve altered it this much, it no longer represents a wildlife or landscape photo, its art.

In people photography, I’m fundamentally against body sculpting. I don’t like how I look in photos but I’m not about to do more than straighten my hair and maybe add a little makeup to it, I won’t be ‘thinning’ myself or making that crazy big butt thing that is all the rage. This is really important – to all of the influencers who wouldn’t be caught dead without your photos being shopped all out of proportion, you are setting an impossible standard for our younger and very impressionable population. To me, you need to state that the picture you just altered beyond belief is now FAKE.

All the young selfie takers – quit putting your lips into the duck bill thing, it looks dumb, and you will regret it when you get older. You’re already beautiful, you don’t need to pose like that, and you don’t need to alter your pictures into something you’re not.

In my photography, if I’ve altered it beyond filtering, or removing trash/graffiti, I will tell you I’ve done that. I won’t represent it as ‘real’ when it isn’t.

Thanks for letting me ramble. Keep taking pictures! Kathy